Teacher Portal
Investigation 4: Lab
Be Prepared
Teacher Preparation for the Investigation includes the following. This preparation should be done prior to students arriving in the lab.
- Place all materials at the distribution center.
- Divide students into five cooperative groups.
Note: Each student lab group will need the materials listed below.
Student Preparation for the Investigation includes having students gather the following materials. This preparation occurs on Lab day after student lab groups have settled at their assigned lab tables.
Note: The materials are listed in the Student Guide. They are also listed below for your reference.
Ongoing Prenatal Development Activity
- Chromebook/Laptop per lab group
- metric ruler or meter stick
- Triple-beam balance (or digital scale)
- Modeling clay
Fetal Hearing Simulation
- Chromebook/Laptop with Student Guide
- stethoscope
- (2) 1-liter plastic jars with lids
- 1.5 liter tap water
- masking tape
- (2) square sterile gauze
- (2) orthodontic rubber bands
Direct one student from each lab group to collect materials.
Amniotic Fluid Simulation
- Chromebook/Laptop with Student Guide
- plastic jar
- water
- raw chicken egg
- paper towels
EXPERIMENTS
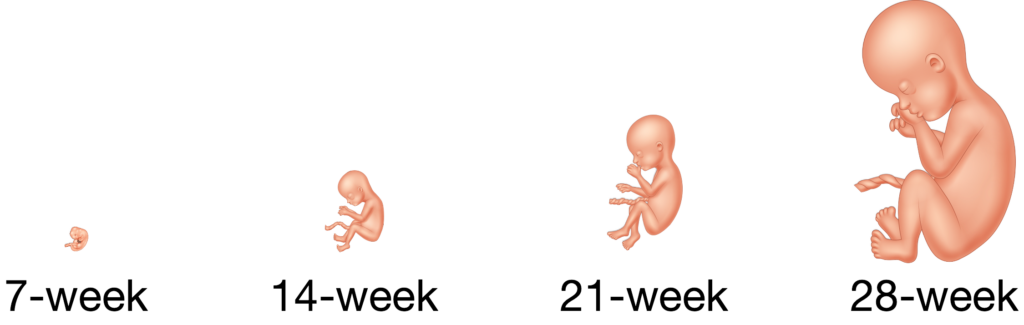
In the Investigation 4 lab, you will perform two activities. The first activity (Prenatal Development Model) uses the length and mass of a 28-week fetus to create a clay replica. If possible, compare the 28-week fetus to the models you made at 7, 14, and 21 weeks of development.
In the second activity, you will investigate the protective properties of the amniotic fluid in which the fetus floats.
Prenatal Development Model
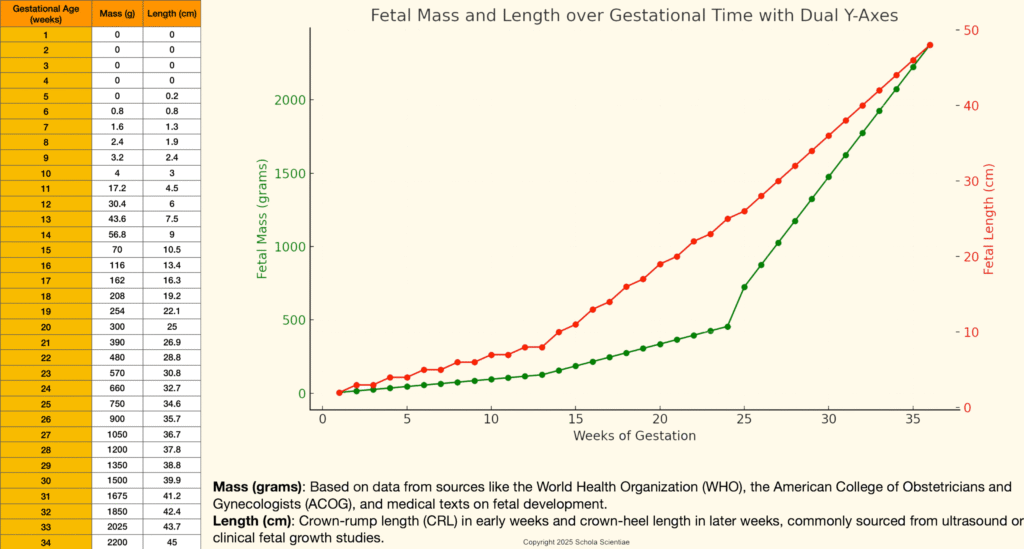
1. Use a triple-beam balance (or digital scale) to weigh out a piece of modeling clay to the mass indicated in week 28 of the Data Table. Record the mass of your 28-week model in the Student Guide.
2. Next, consult the Data Table once again to find the approximate length of the fetus at this gestational age (28 weeks).
3. Using a metric ruler or meter stick, measure your model and form it to be the approximate length listed in the Data Table. Record the length of your 28-week model in the Student Guide.
4. Describe the size and shape of your 28-week fetus model.
Fetal Hearing Simulation
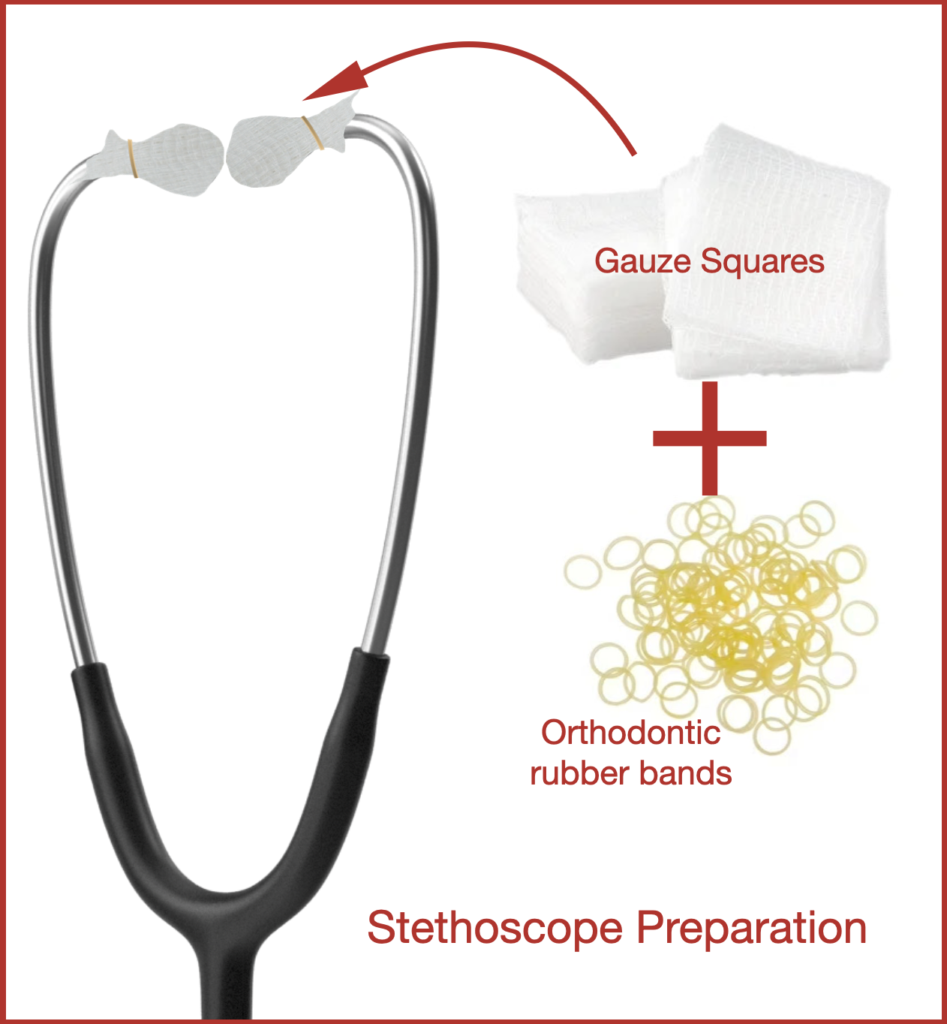
1. Prepare the stethoscope: NOTE: each student should perform this step before using the stethoscope.
a. Use a small orthodontic rubber band to affix a square sterile gauze to each of the two ear pieces of your stethoscope (see top diagram to the right).
2. Test the empty jar (no amniotic fluid) first:
a. With the stethoscope on, carefully lower the diaphragm (end) of the stethoscope into the empty (no amniotic fluid) jar (see lower diagram to the right).
b. Gently tap on the side of the empty jar and listen to the sound.
c. Record what you hear tapping the empty jar.
3. Test the water-filled (amniotic fluid) jar next:
a. With the stethoscope on, lower the diaphragm (end) of the stethoscope into the water-filled jar.
b. Gently tap on the side of the empty jar and listen to the sound.
c. Record what you hear tapping the water-filled (amniotic fluid) jar.
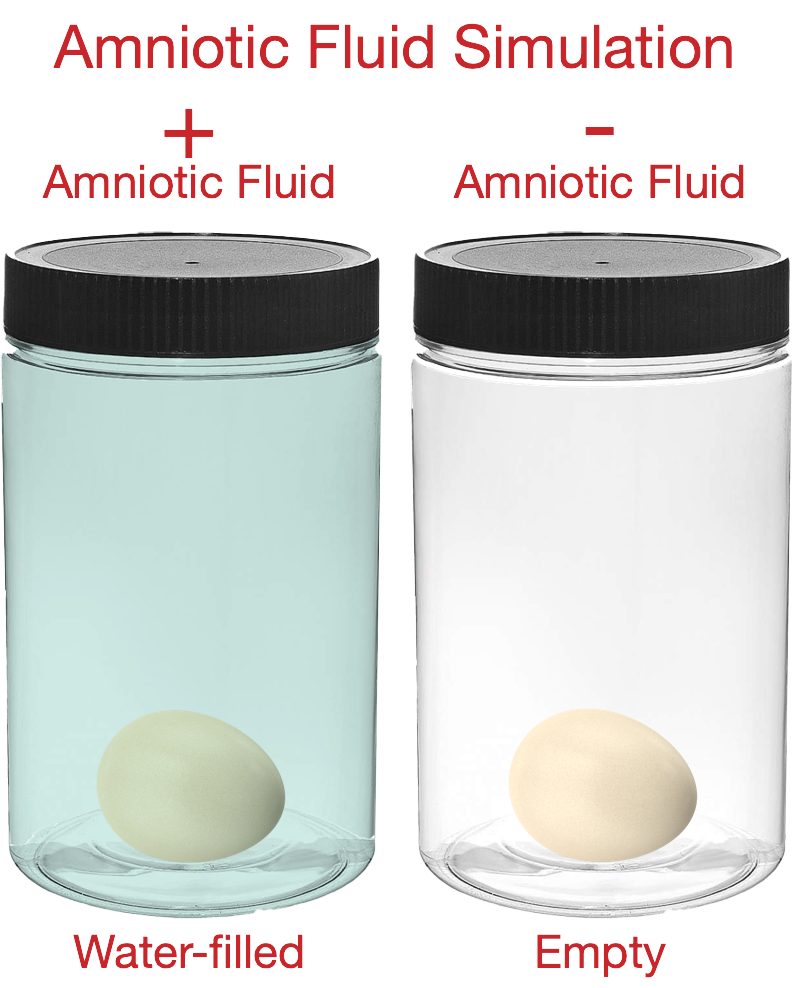
Amniotic Fluid Protection Simulation
With Amniotic Fluid
- Carefully lower a raw chicken egg into the plastic jar.
- Fill the jar with tap water to the very brim. The jar with the egg should be so filled with water that when you place the lid on the jar and screw it tightly closed, water overflows from under the lid.
- Tightly screw the top on so no water leaks out.
- Dry the jar, containing the water and egg, with paper towels.
- Once the jar is dried from the outside, briskly shake the jar and attempt to break the egg inside.
- Record your observations in your Student Guide.
Without Amniotic Fluid
- Open the jar on the bench and carefully pour out the water into another container or into a sink. Be careful to leave the egg in the empthy jar.
- Once again, tightly screw on the lid.
- Dry the outside of the jaj with paper towels.
- Now, briskly shake the jar and attempt to break the egg inside.
- Record your observations in your Student Guide.