Teacher Portal
Investigation 3: Lab
Maternal-Fetal Interaction
Be Prepared
Teacher Preparation for the Investigation includes the following. This preparation should be done prior to students arriving in the lab.
- Place all materials at the distribution center.
- Divide students into five cooperative groups.
Note: Each student lab group will need the materials listed below.
Student Preparation for the Investigation includes having students gather the following materials. This preparation occurs on Lab day after student lab groups have settled at their assigned lab tables.
Note: The materials are listed in the Student Guide. They are also listed below for your reference.
Ongoing Prenatal Development Activity
- Chromebook/Laptop with Student Guide
- metric ruler or meter stick
- Triple-beam balance (or digital scale)
- Modeling clay
Placenta Simulation Experiment
- Chromebook/Laptop (or SDR)
- D-Glucose
- Corn starch
- Distilled water (~150 ml total)
- Acidic Acid (vinegar)
- 100 ml graduated cylinder
- 250 ml glass beaker
- Filter paper (Ahlstrom #601) Funnel
- pH paper
- Glucose test strips
- Safety glasses or goggles
- Stirring rod
- 15 ml centrifuge tube
Direct one student from each lab group to collect the materials required.
Modeling Chromosomes During Mitosis
- Mixed gram cubes:
- 14 of one color
- 10 of a different color
- 8 of a different color
- 2 of a different color
- small balls of clay
- 4 pieces of string about 40 cm in length
- 2 pieces of string about 60 cm in length
Direct one student from each lab group to collect the materials required.
Investigate
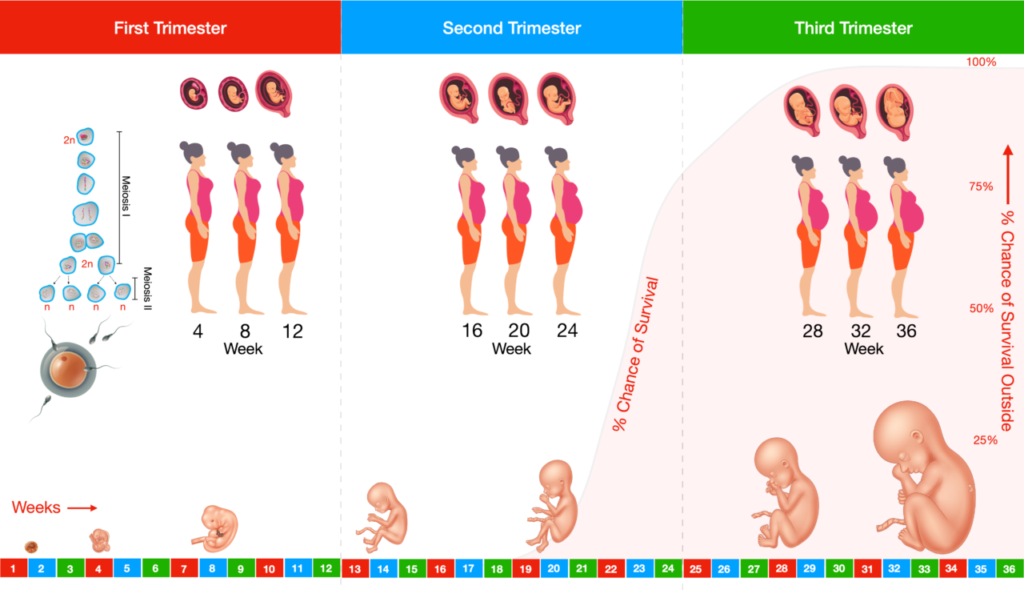
- Have students create a clay model of a 21-week fetus and record its mass and length in their Student Guides.
- Explain that, in the lab, students will model the selective permeability of the placenta as it filters different kinds of molecules.
- Explain to students that every procedural step is important during the experiment. If one step is skipped, data can become invalid. To help students keep on track, direct them to read each step thoroughly, complete the step, then check it off (Read it – Do it – Check it off).
Note: The procedural steps are listed below for your reference. Teacher “Notes” are inserted, as needed, to help facilitate the lab.
Experiment
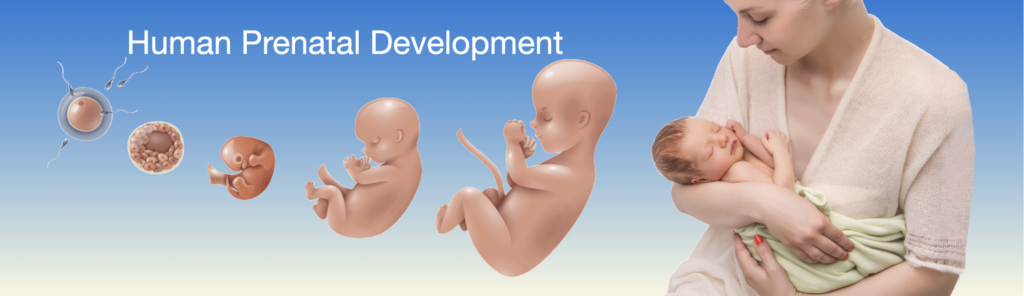
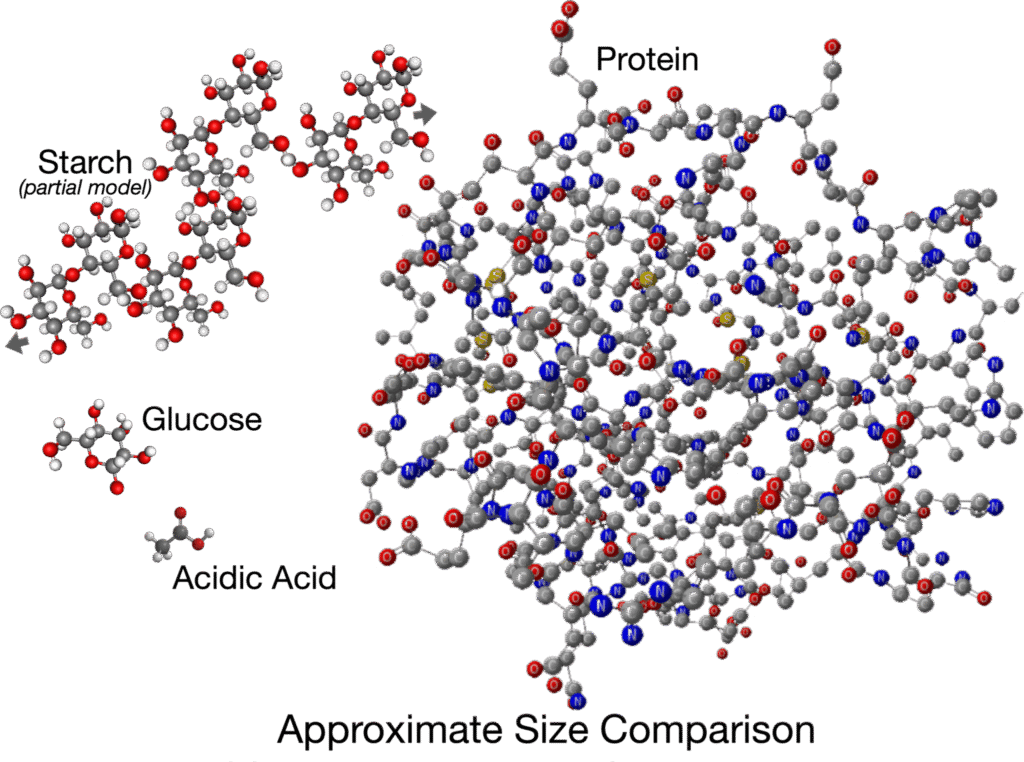
In the Investigation 3 lab, you will build two models. The first (Modeling the Mirical) uses the length and mass of a 21-week fetus to create a clay replica. The growing baby is called an embryo until the 9th week after conception, at which point it is referred to as a fetus.
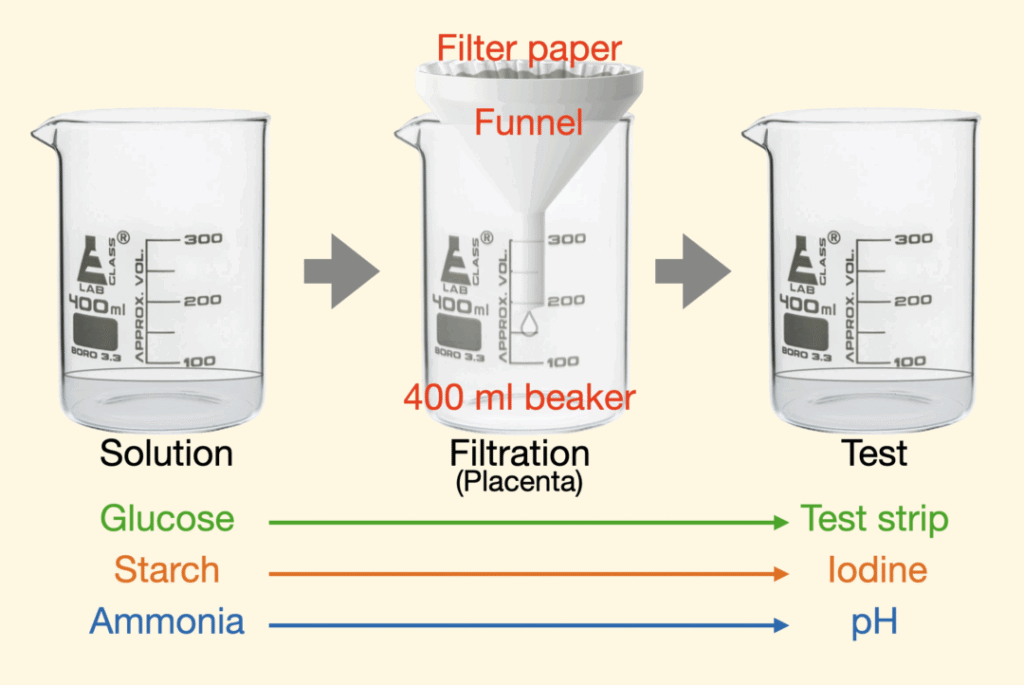
In the second model, you will simulate the important process of filtration that is performed by the placenta.
Prenatal Development Model
1. Use a triple-beam balance (or digital scale) to weigh out a piece of modeling clay to the mass indicated in week 21 of the Data Table. Record the mass of your 21-week model in the Student Guide.
2. Next, consult the Data Table once again to find the approximate length of the embryo at this gestational age (21 weeks).
3. Using a metric ruler or meter stick, measure your model and form it to be the approximate length listed in the Data Table. Record the length of your 21-week model in the Student Guide.
4. Describe the size and shape of your 21-week fetus model (remember that the baby is referred to as an embryo until the 9th week of gestation; thereafter, it is referred to as a fetus).
5. Depending on your resources, keep the 21-week model embryo to compare from week to week (it will harden unless stored in a sealed plastic baggie) or return it to the modeling clay container.

Prenatal Model
The placenta is one of the most important and fascinating organs in the human body—and it exists for only nine months! It connects the developing baby (the fetus) to the mother, allowing the baby to receive nutrients and oxygen while getting rid of waste. Even though it seems like the baby is “inside” the mother, the two don’t actually share blood.
Instead, the placenta acts as a barrier and bridge—materials from the mother’s blood move through the placenta into the baby’s blood without the two ever mixing. That’s important, because the baby might have a completely different blood type than the mother. If their blood mixed directly, it could trigger the mother’s immune system to attack the baby’s cells. Thankfully, the placenta keeps their blood in separate networks of vessels, with exchange happening across very thin membranes by diffusion, similar to how nutrients are absorbed in the mother’s digestive system.
1. Prepare Solutions:
a. Dissolve 20 g of glucose in 100 ml of distilled water to create a 20% glucose solution.
b. In a clean 15 ml centrifuge tube, carefully pour the acidic acid (vinegar) up to the 10 ml mark.
c. Mix 4 g of corn starch with 100 ml of cold distilled water. Stir thoroughly to make a cloudy suspension. Do not heat.
2. Create the Test Mixture:
a. In a clean beaker, combine:
- 40 ml of the 20% glucose solution
- 10 ml of acidic acid
- 5 ml of the corn starch suspension
b. Stir or swirl to ensure the mixture is evenly blended.
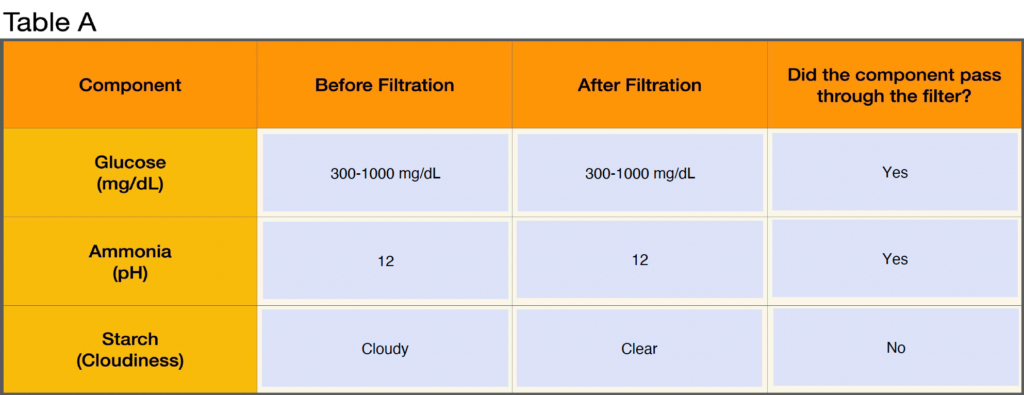
3. Test your mixture for glucose, acidic acid, and starch before filtration:
a. Swirl the test solution and dip a glucose strip into it.
b. Time for 3 minutes and then compare the test strip to the glucose concentration color table on the test strip package. Record the glucose concentration in your Student Guide: This is your “Before” glucose concentration.
c. Next, dip a strip of pH paper into the test solution and compare it to the pH color table on the pH package.
d. Record the pH
e. Starch is not soluble in water, so its presence will cause the test solution to become cloudy. Describe the appearance of your test solution.
4. Filter the Mixture:
a. Set up a funnel lined with filter paper over a clean plastic or glass 250 ml beaker.
b. Slowly pour the full 50 ml of your mixture into the funnel. NOTE: do not pour the sample above the top of the filter paper. If necessary, stop pouring and wait until the liquid level in the filter paper goes down and then pour the remainder of the solution into the filter.
c. Allow the filtrate (the solution that passes through the filter) to collect in the beaker below (let the filtration continue for 5 minutes).
d. Carefully remove the funnel and filter paper and put them aside for later disposal and cleaning.
5. Test the Filtrate:
a. Dip a glucose test strip into the filtrate (the liquid that passed through the paper). A color change indicates glucose passed through. Approximate the glucose concentration compared to color chart.
b. Test pH with pH paper. An acidic reading (less than 7) indicates the presence of acidic acid which passed through the filter.
c. Now check the filtrate to see if it is cloudy. A clear solution suggests the starch did not pass through the filter. Describe the clarity of the filtered solution, and compare it to your earlier observations.
5. Report data Table A: