Teacher Portal

Investigation 2: Lab

Be Prepared

Teacher Preparation 

  • Place all materials at the distribution center before lab begins
  • Divide students into five cooperative groups

Note: Each student lab group will need the materials listed below.

Student Preparation 

Once students are at their lab stations, direct one student from each group to collect the following:

Ongoing Prenatal Development Activity:

  • Chromebook or laptop with Student Guide
  • Metric ruler or meter stick
  • Triple-beam balance or digital scale
  • Modeling clay

Modeling Meiosis:

  • Colored gram cubes:
  • 4 of one color
  • 4 of a second color
  • 4 of a third color
  • 4 of a fourth color
  • small balls of clay (for centromeres)
  • 4 pieces of string about 40 cm in length (for spindle fibers)
  • 2 pieces of string about 60 cm in length or large red rubber bands (for nuclear membrane)
  • Blank paper for modeling workspace


Experiment

In the Investigation 2 lab, students will build two models. The first (Prenatal Development Model) uses the length and mass of a 14-week embryo to create a clay replica. The growing baby is called an embryo until the 9th week after conception, at which point it is referred to as a fetus. You will continue to return to this model embryo as the Human Prenatal Development CELL progresses, modeling the fetus at 14 weeks, 21 weeks, and 28 weeks.

The second model students will construct simulates the important process of meiosis, in which the cell’s genetic information is prepared for reproduction through the formation of egg and sperm cells. These cells are called gametes.

Prenatal Development Model

  • Use a triple-beam balance or digital scale to weigh out a piece of modeling clay to match the mass listed for 14 weeks in the Data Table.
    Record the mass in the Student Guide.
  • Check the Data Table again to find the length of the fetus at 14 weeks.
  • Shape your model to the correct length using a metric ruler or meter stick.
    Record the length in the Student Guide.
  • Describe the size and shape of your 14-week fetal model. Compare it with the 7-week embryo model from Investigation 1.
  • If resources allow, preserve both the 7-week and 14-week models for future comparisons. Store in labeled plastic bags or containers.

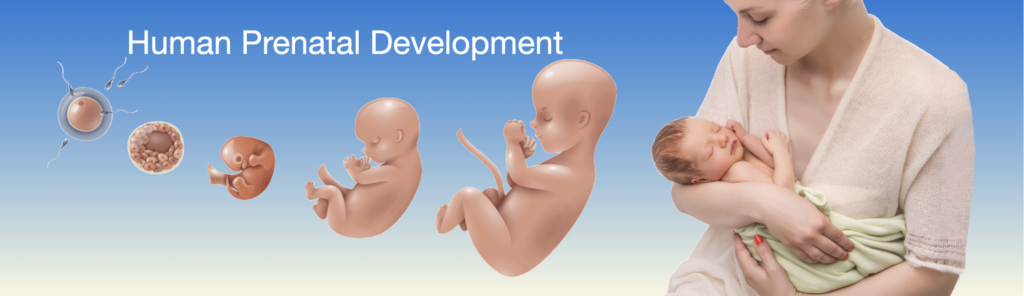
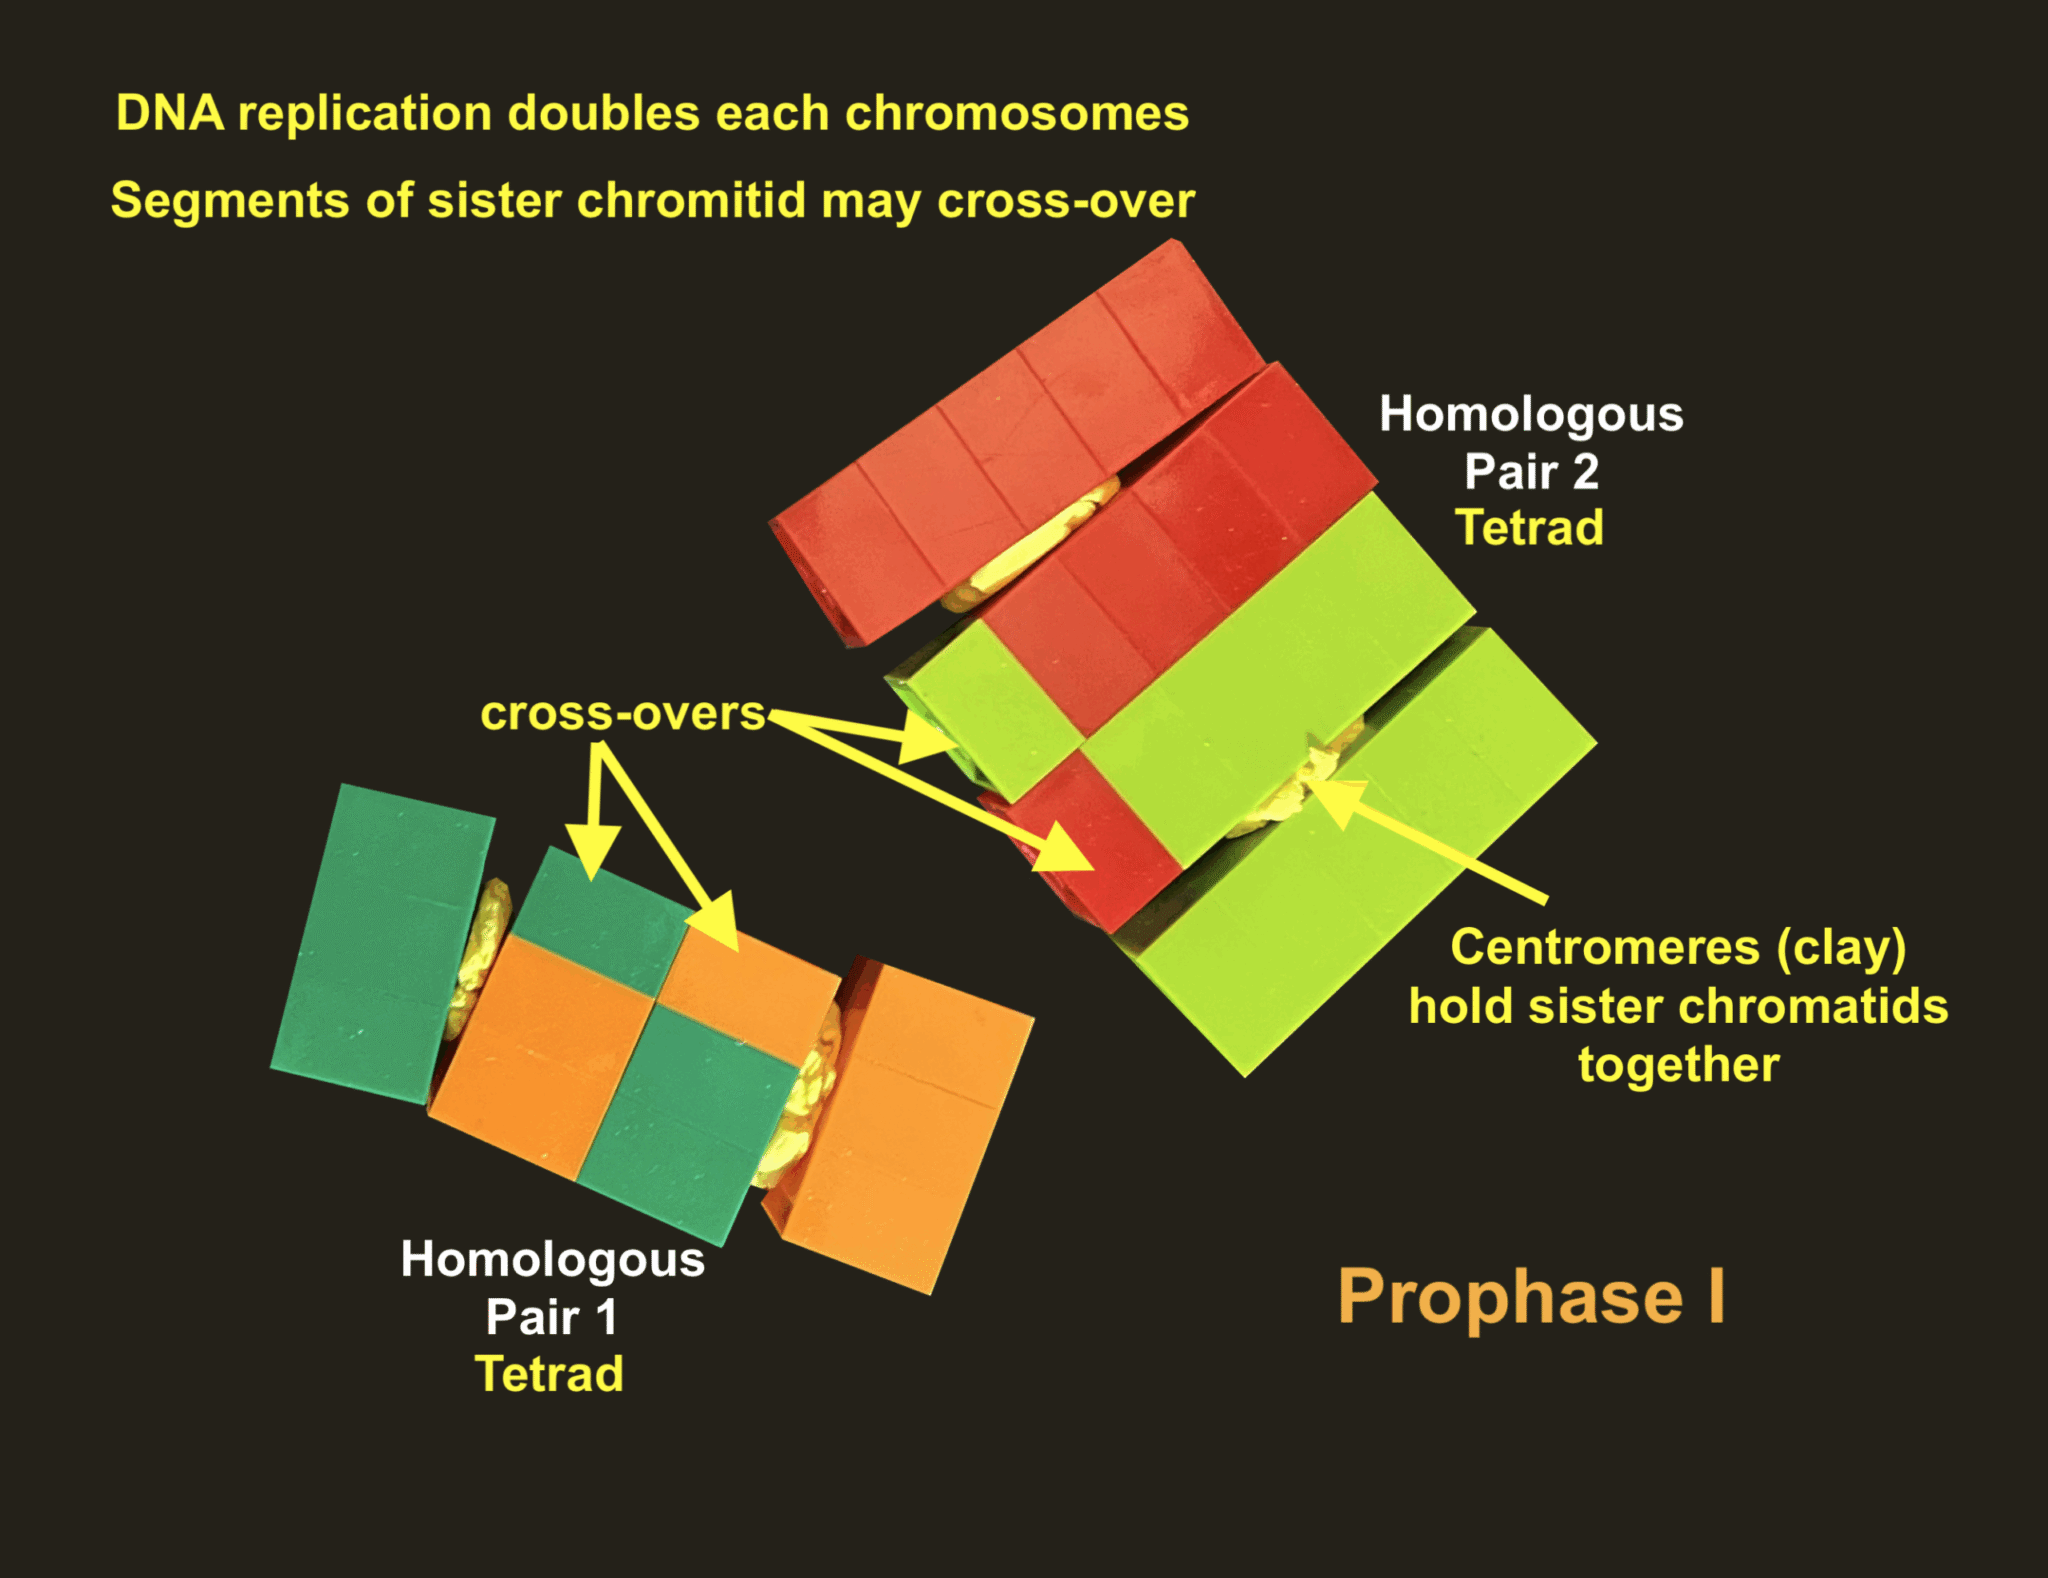
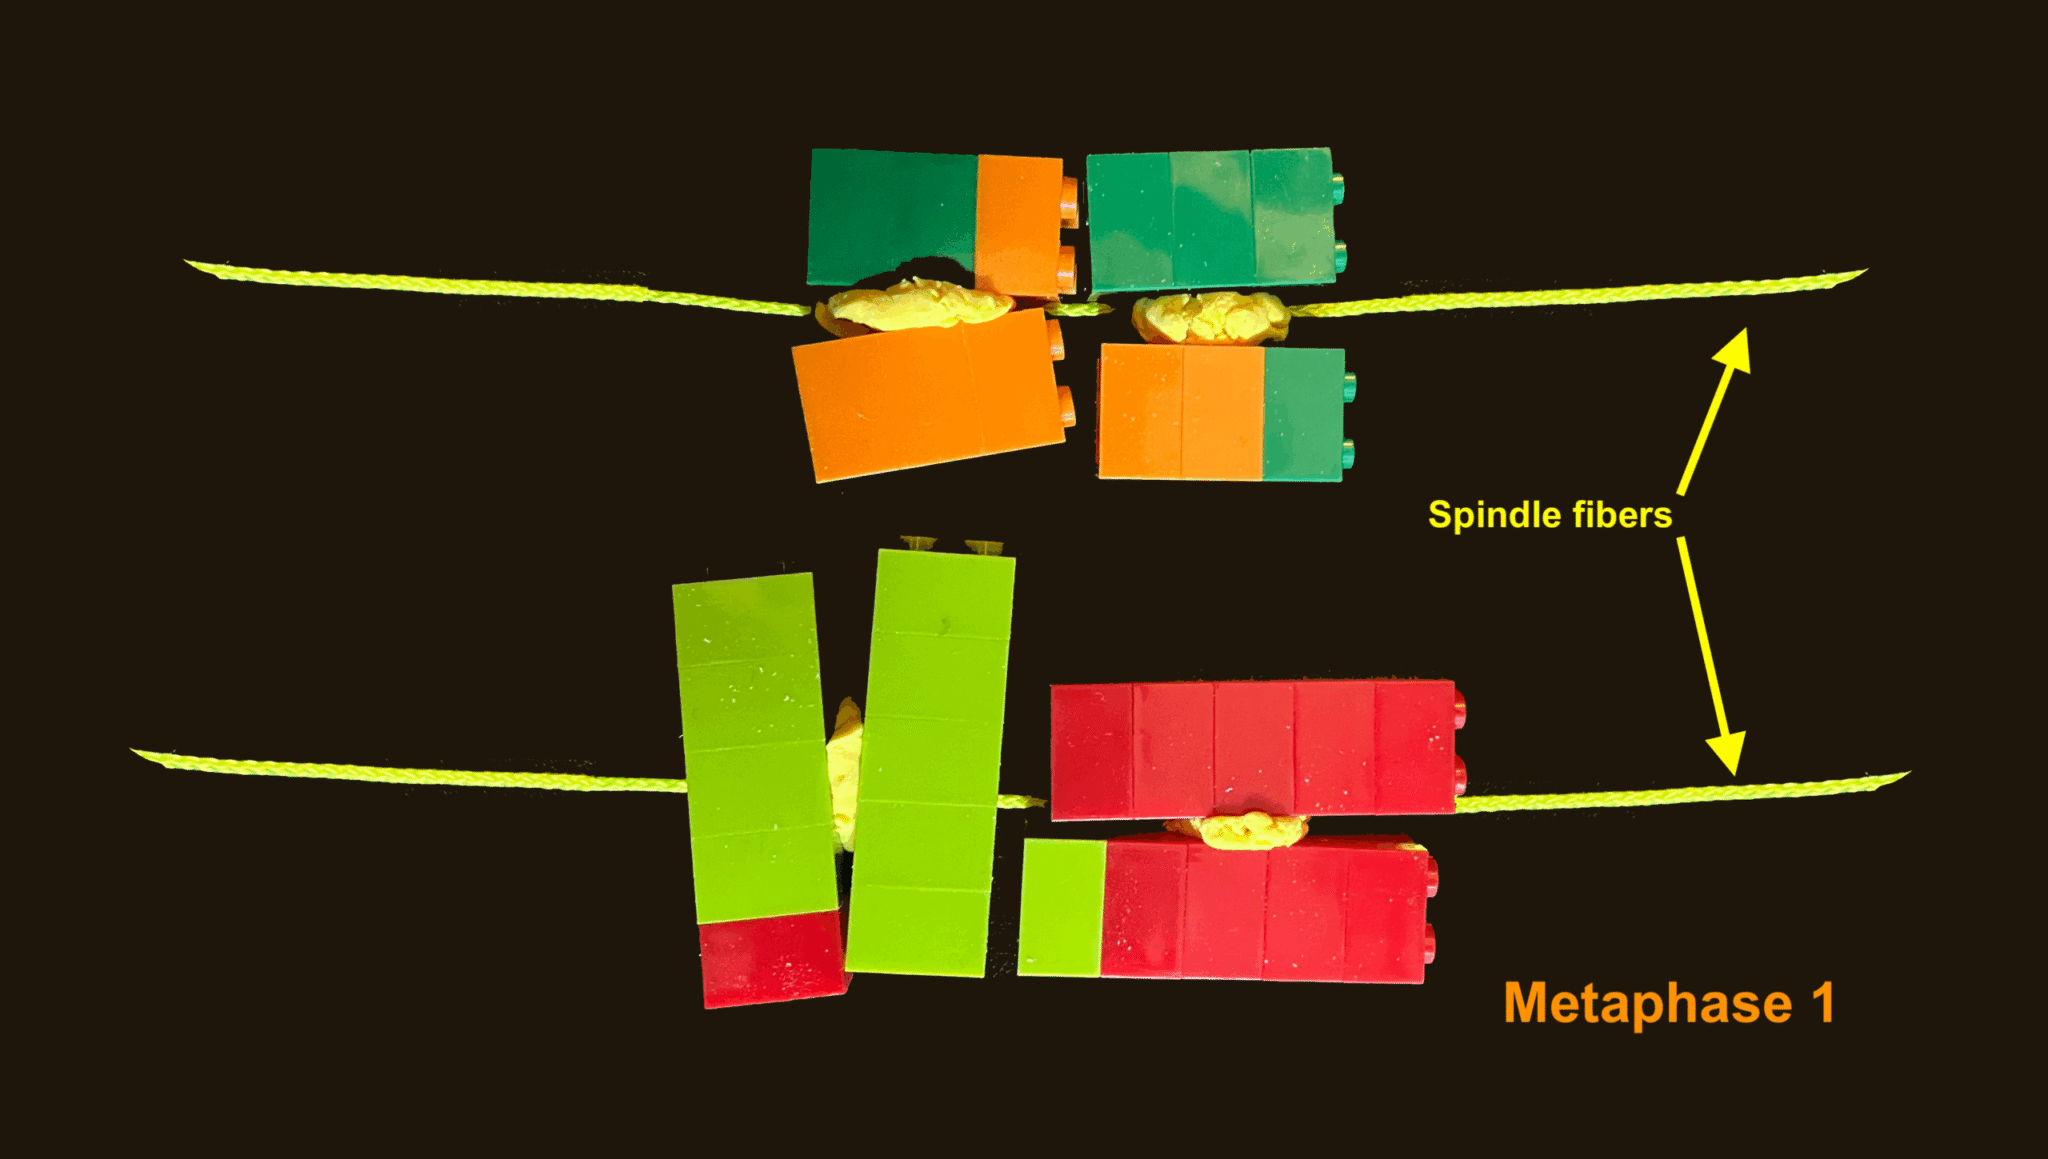
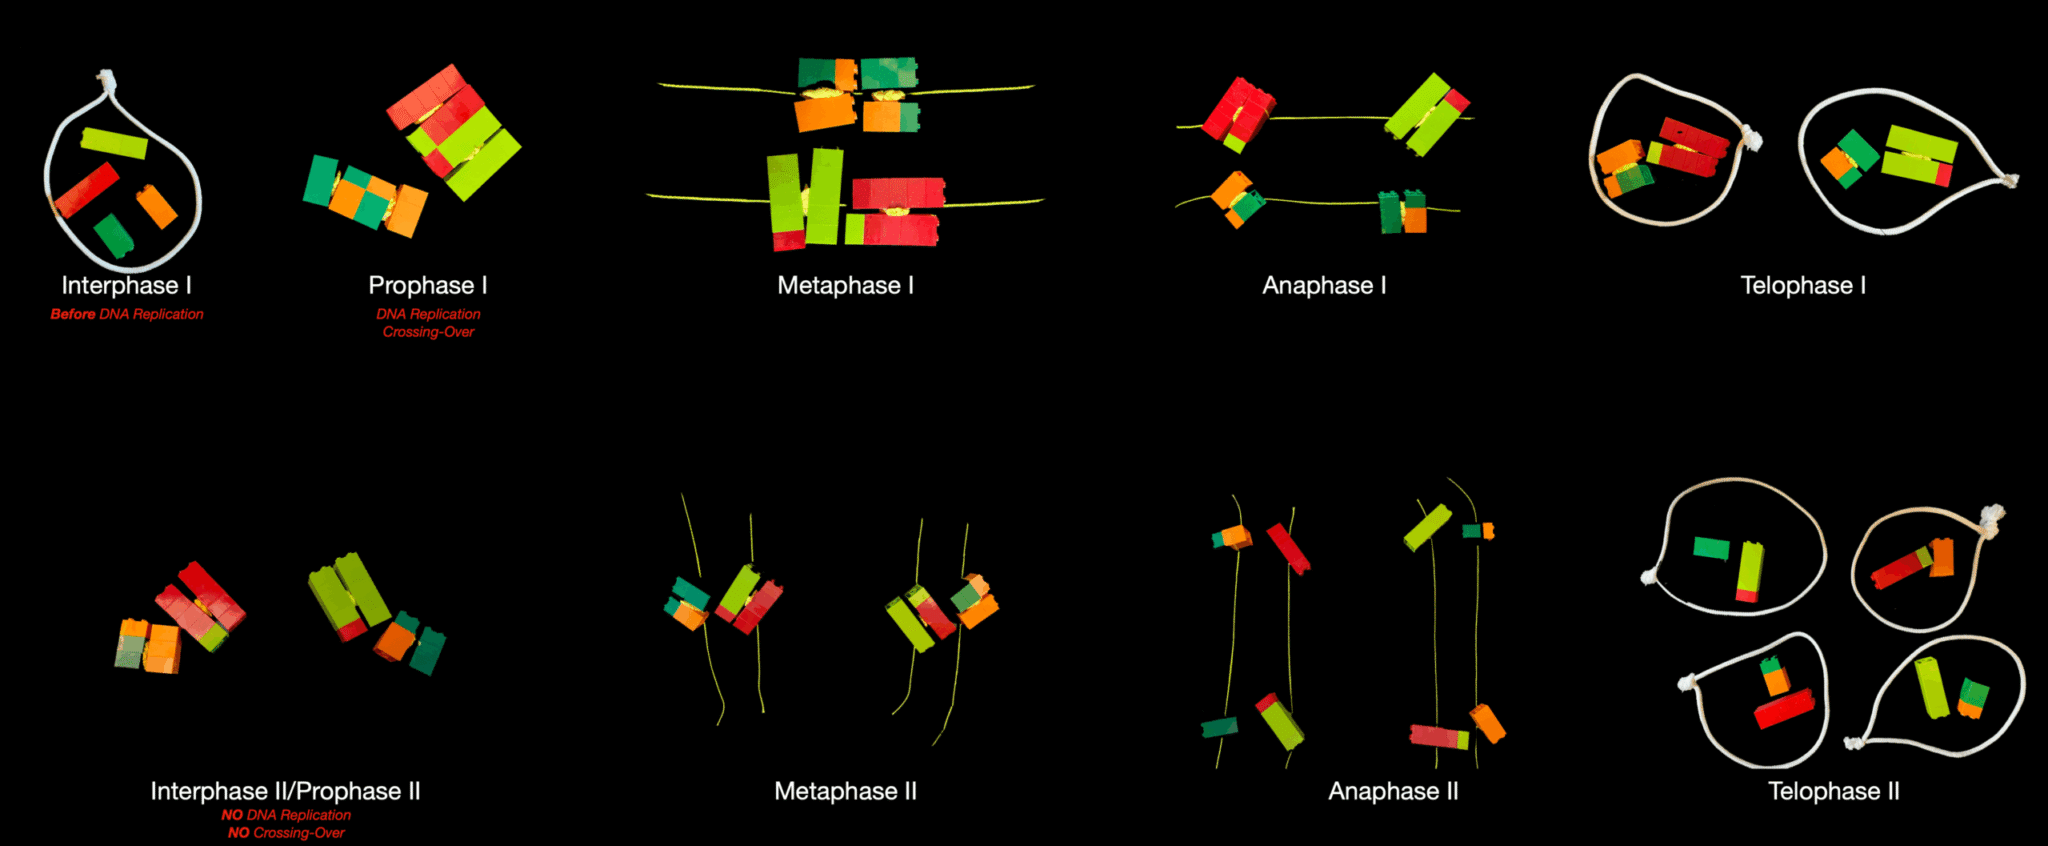
Modeling Meiosis in Humans

In humans, most cells contain 46 chromosomes, arranged in 23 pairs — one chromosome in each pair from the mother and one from the father. In humans, we refer to a full set of 23 chromosome pairs (46 chromosomes total/cell) as diploid or sometimes simply 2n.

However, in gametes (sperm and egg cells) there are only 23 chromosomes total. In humans,, we refer to a half set of 23 chromosomes/cell as haploid or sometimes simply n. This is so that when the sperm and egg combine at fertilization, the resulting cell has the correct total of 46 chromosomes (diploid, 2n) again.

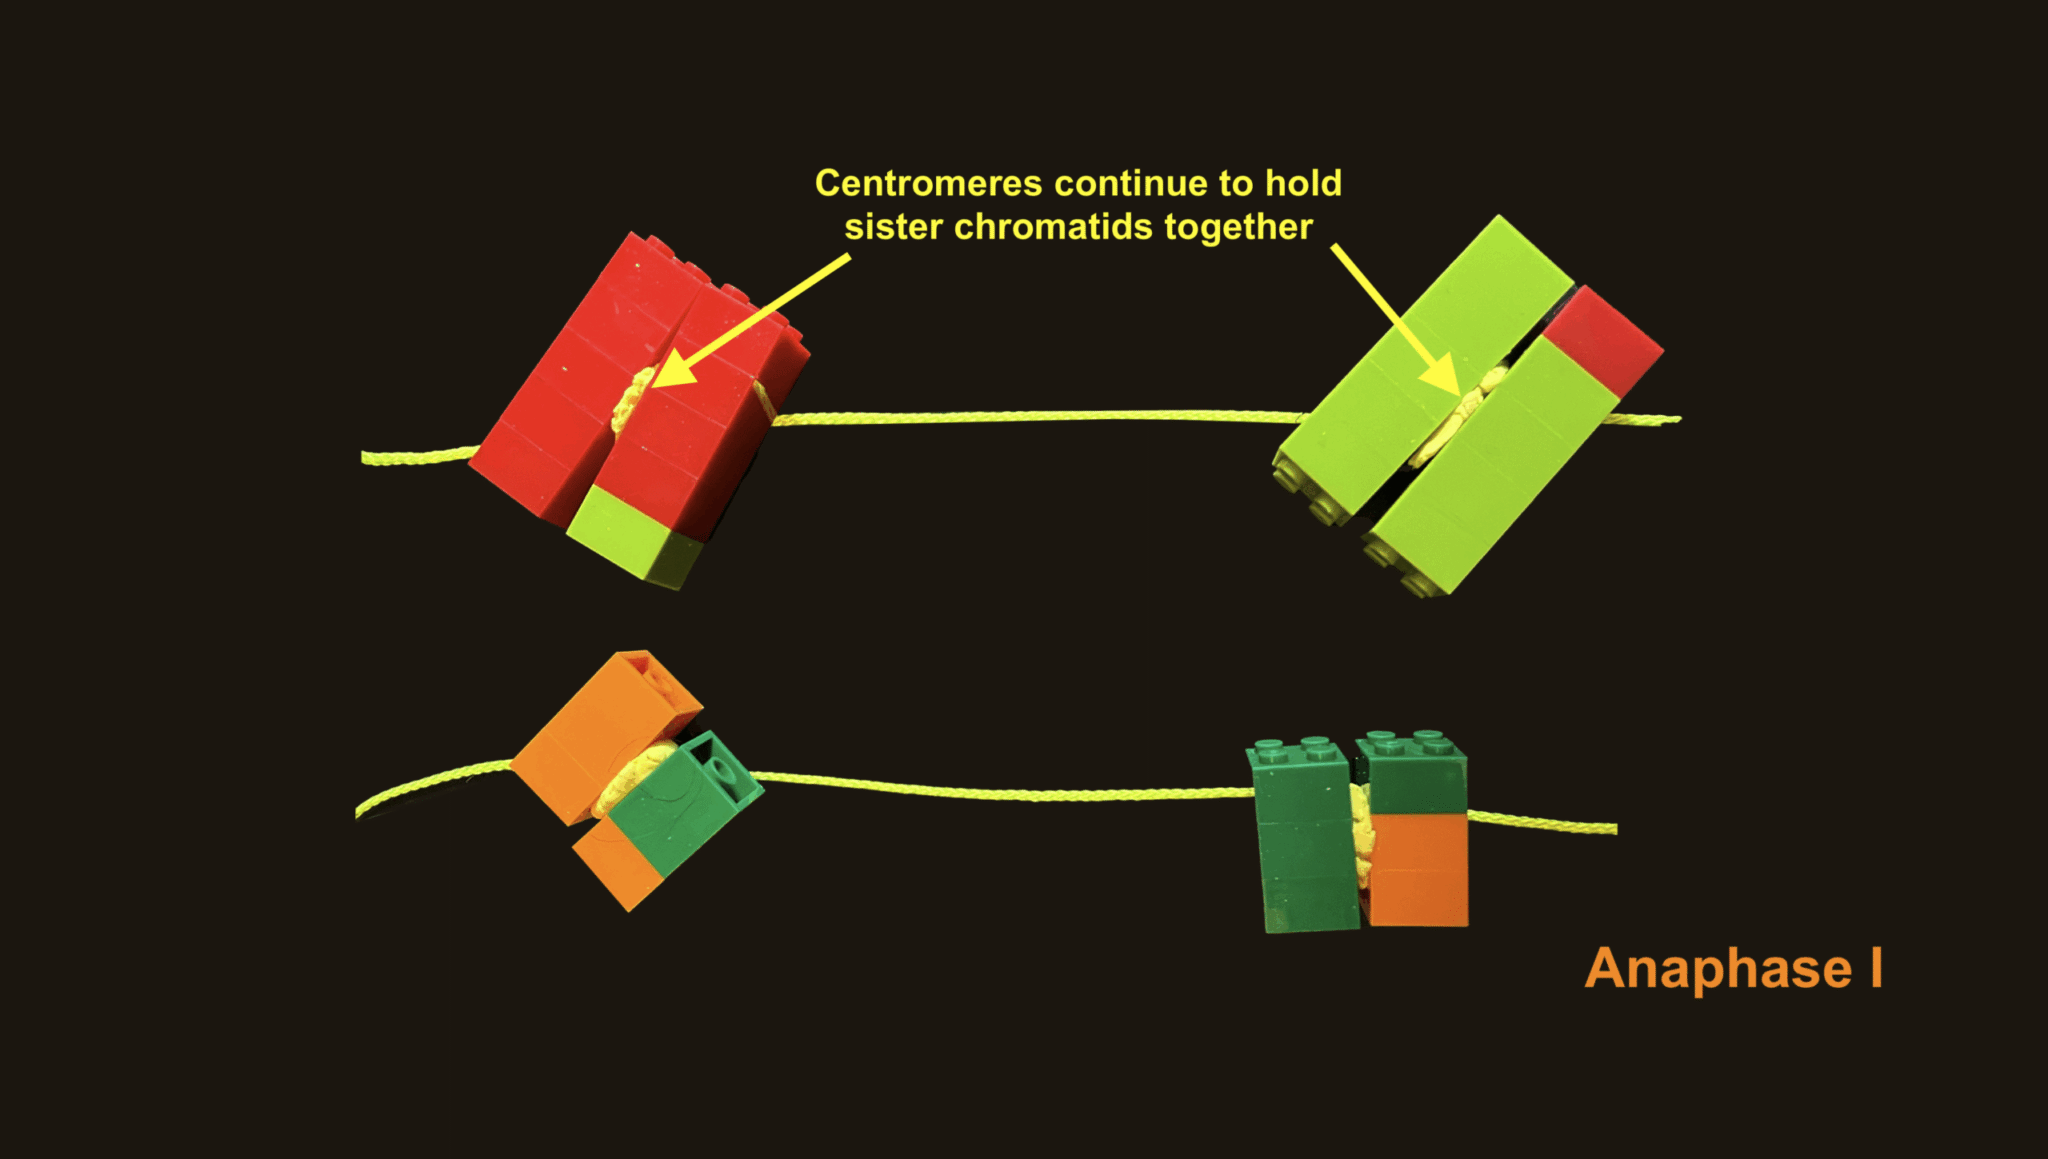
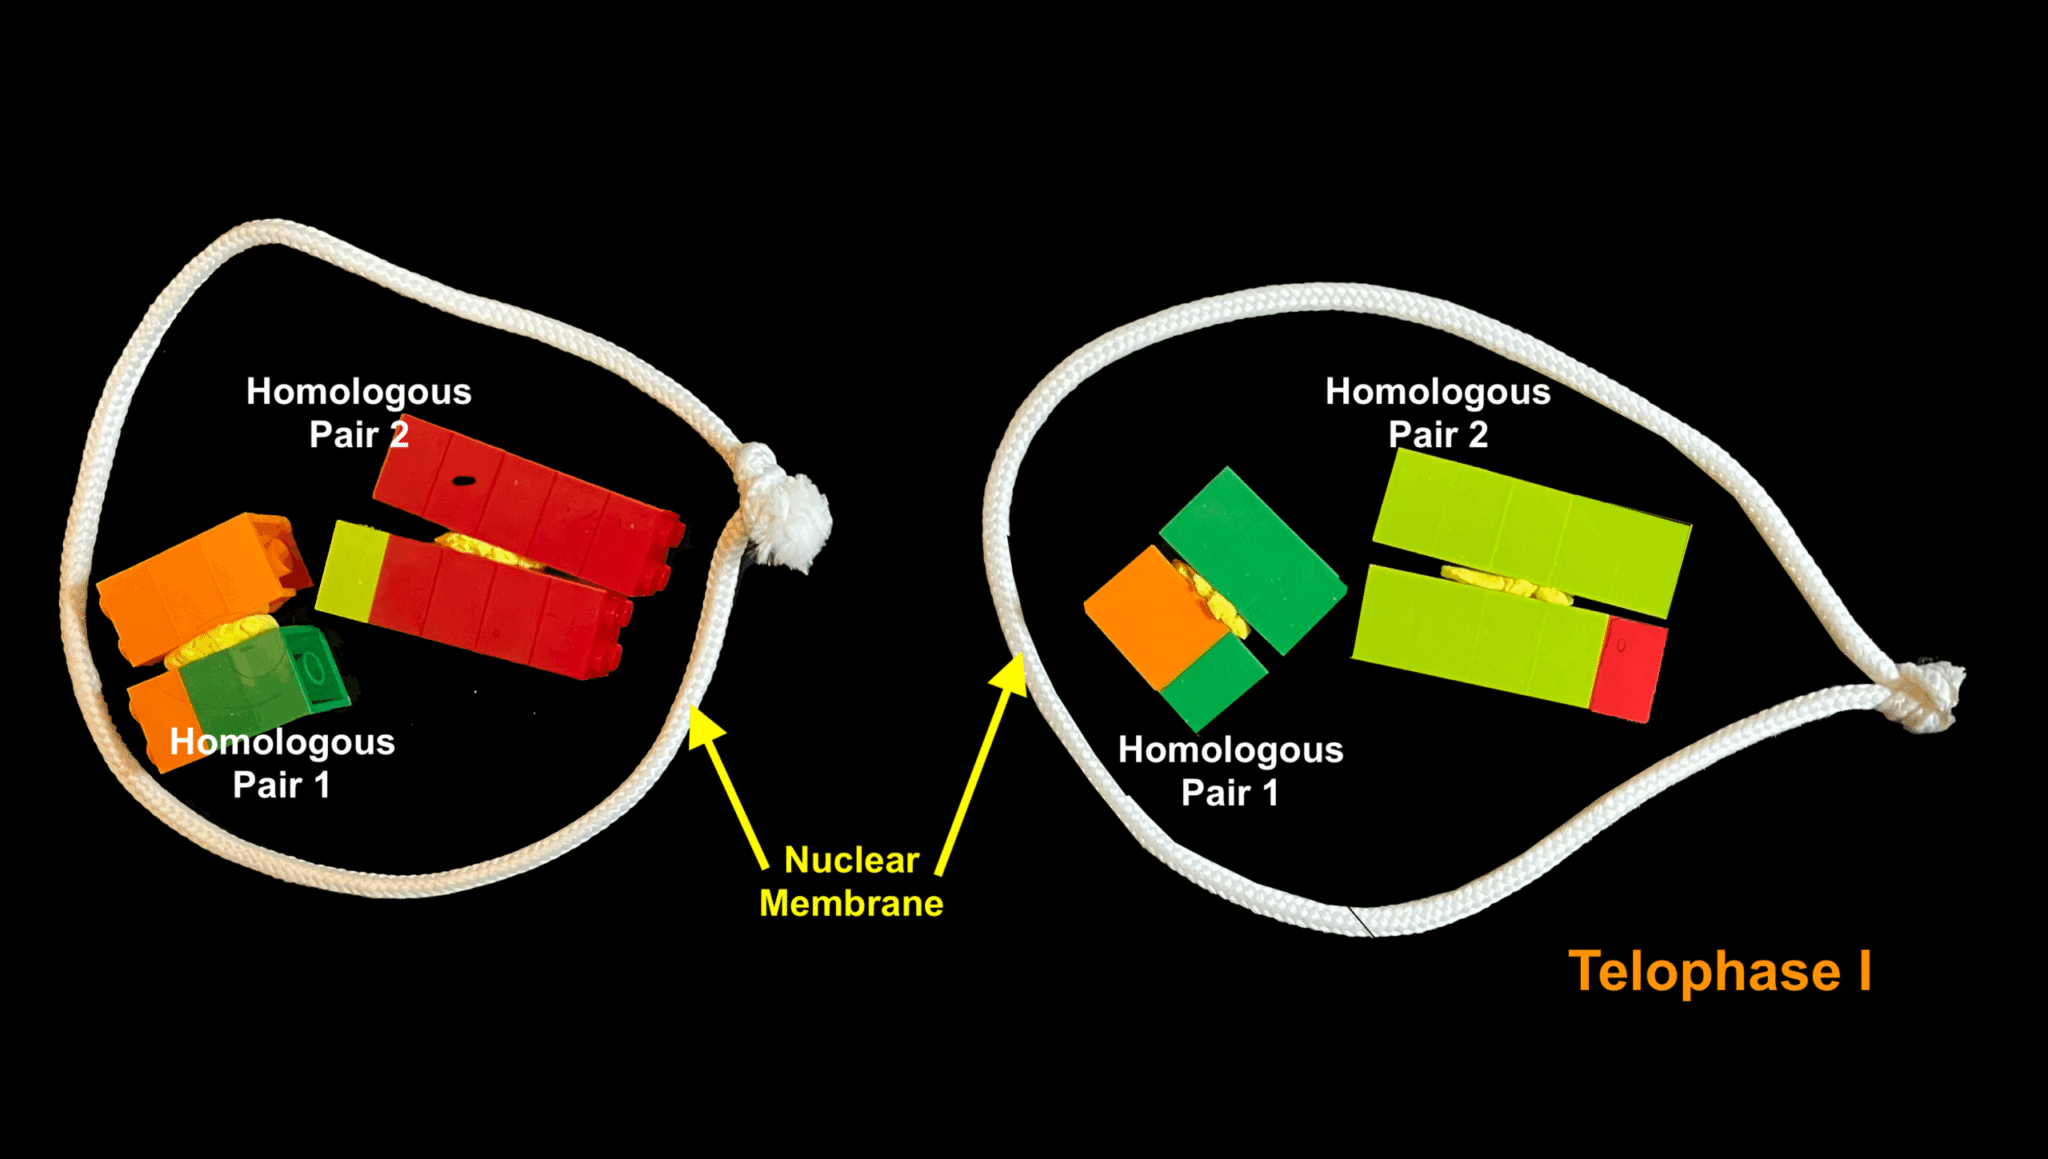
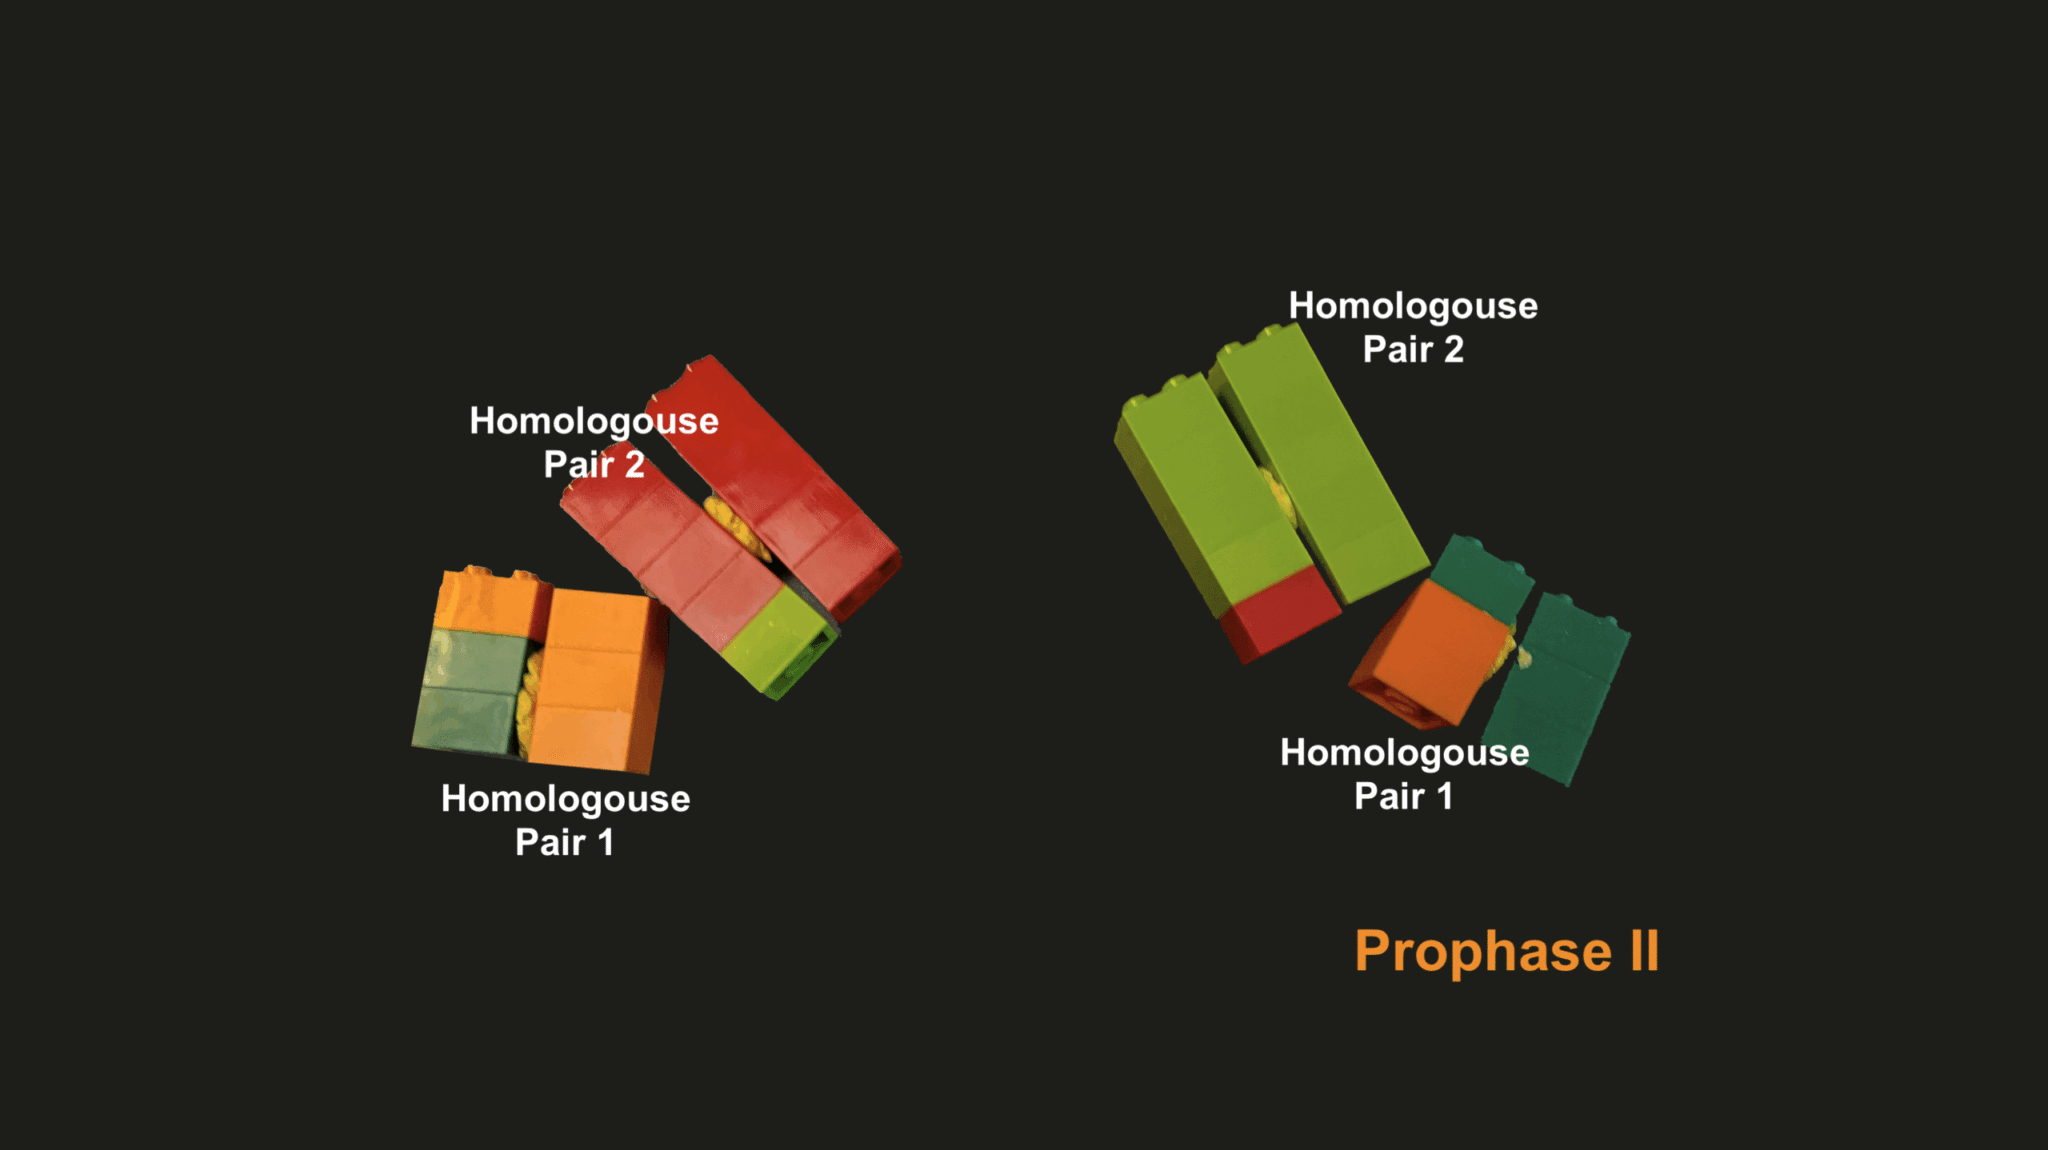
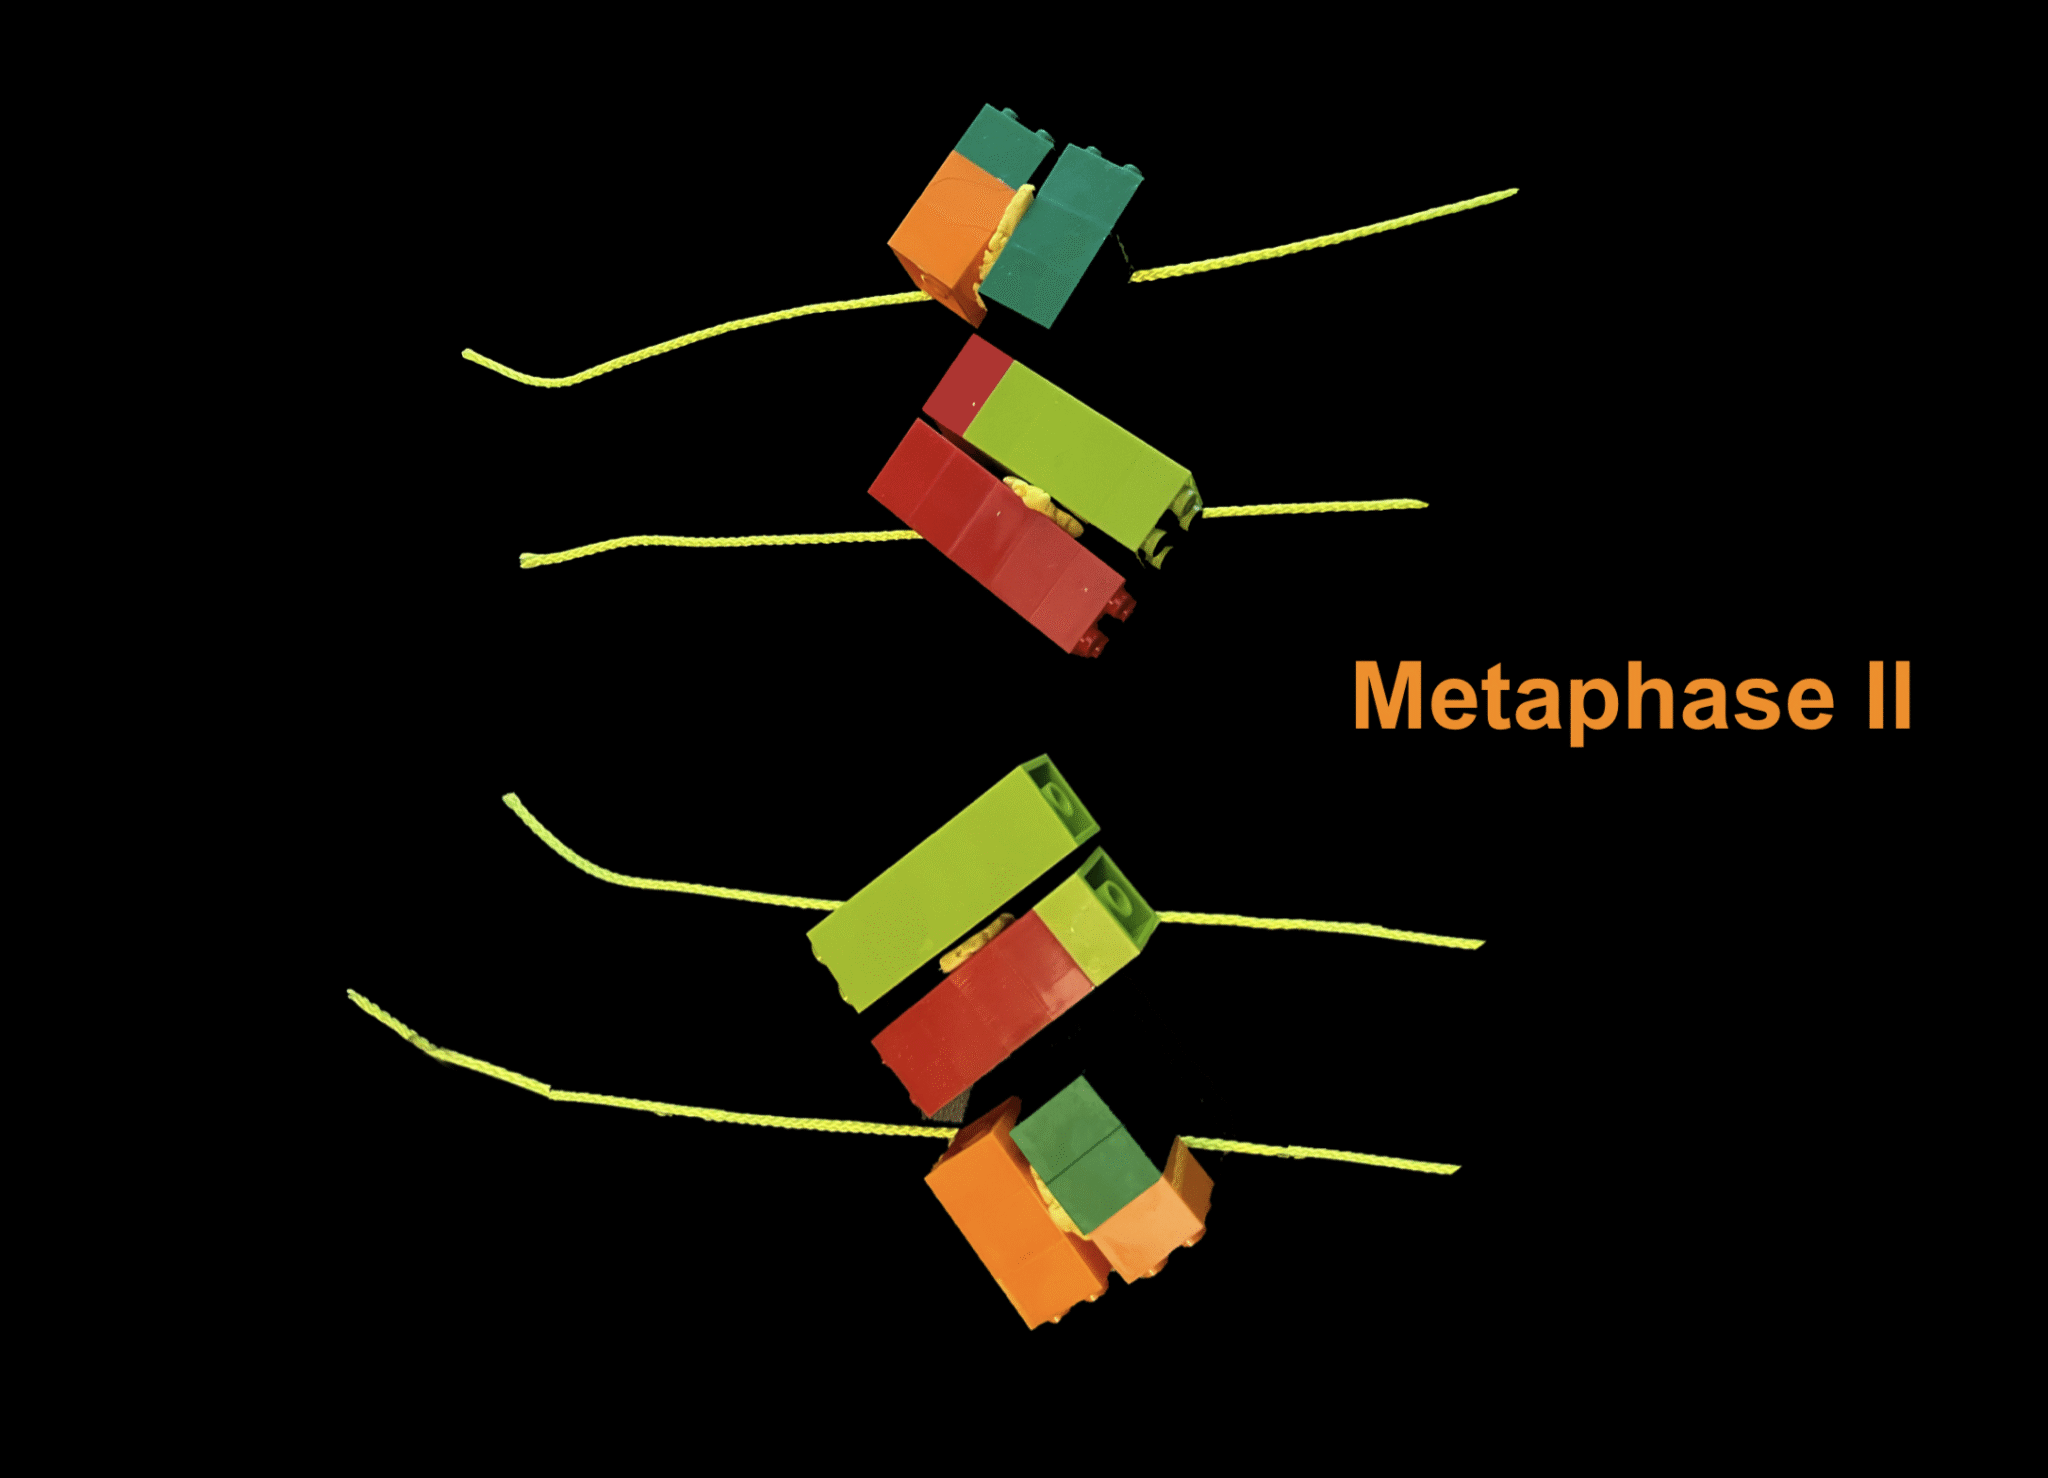
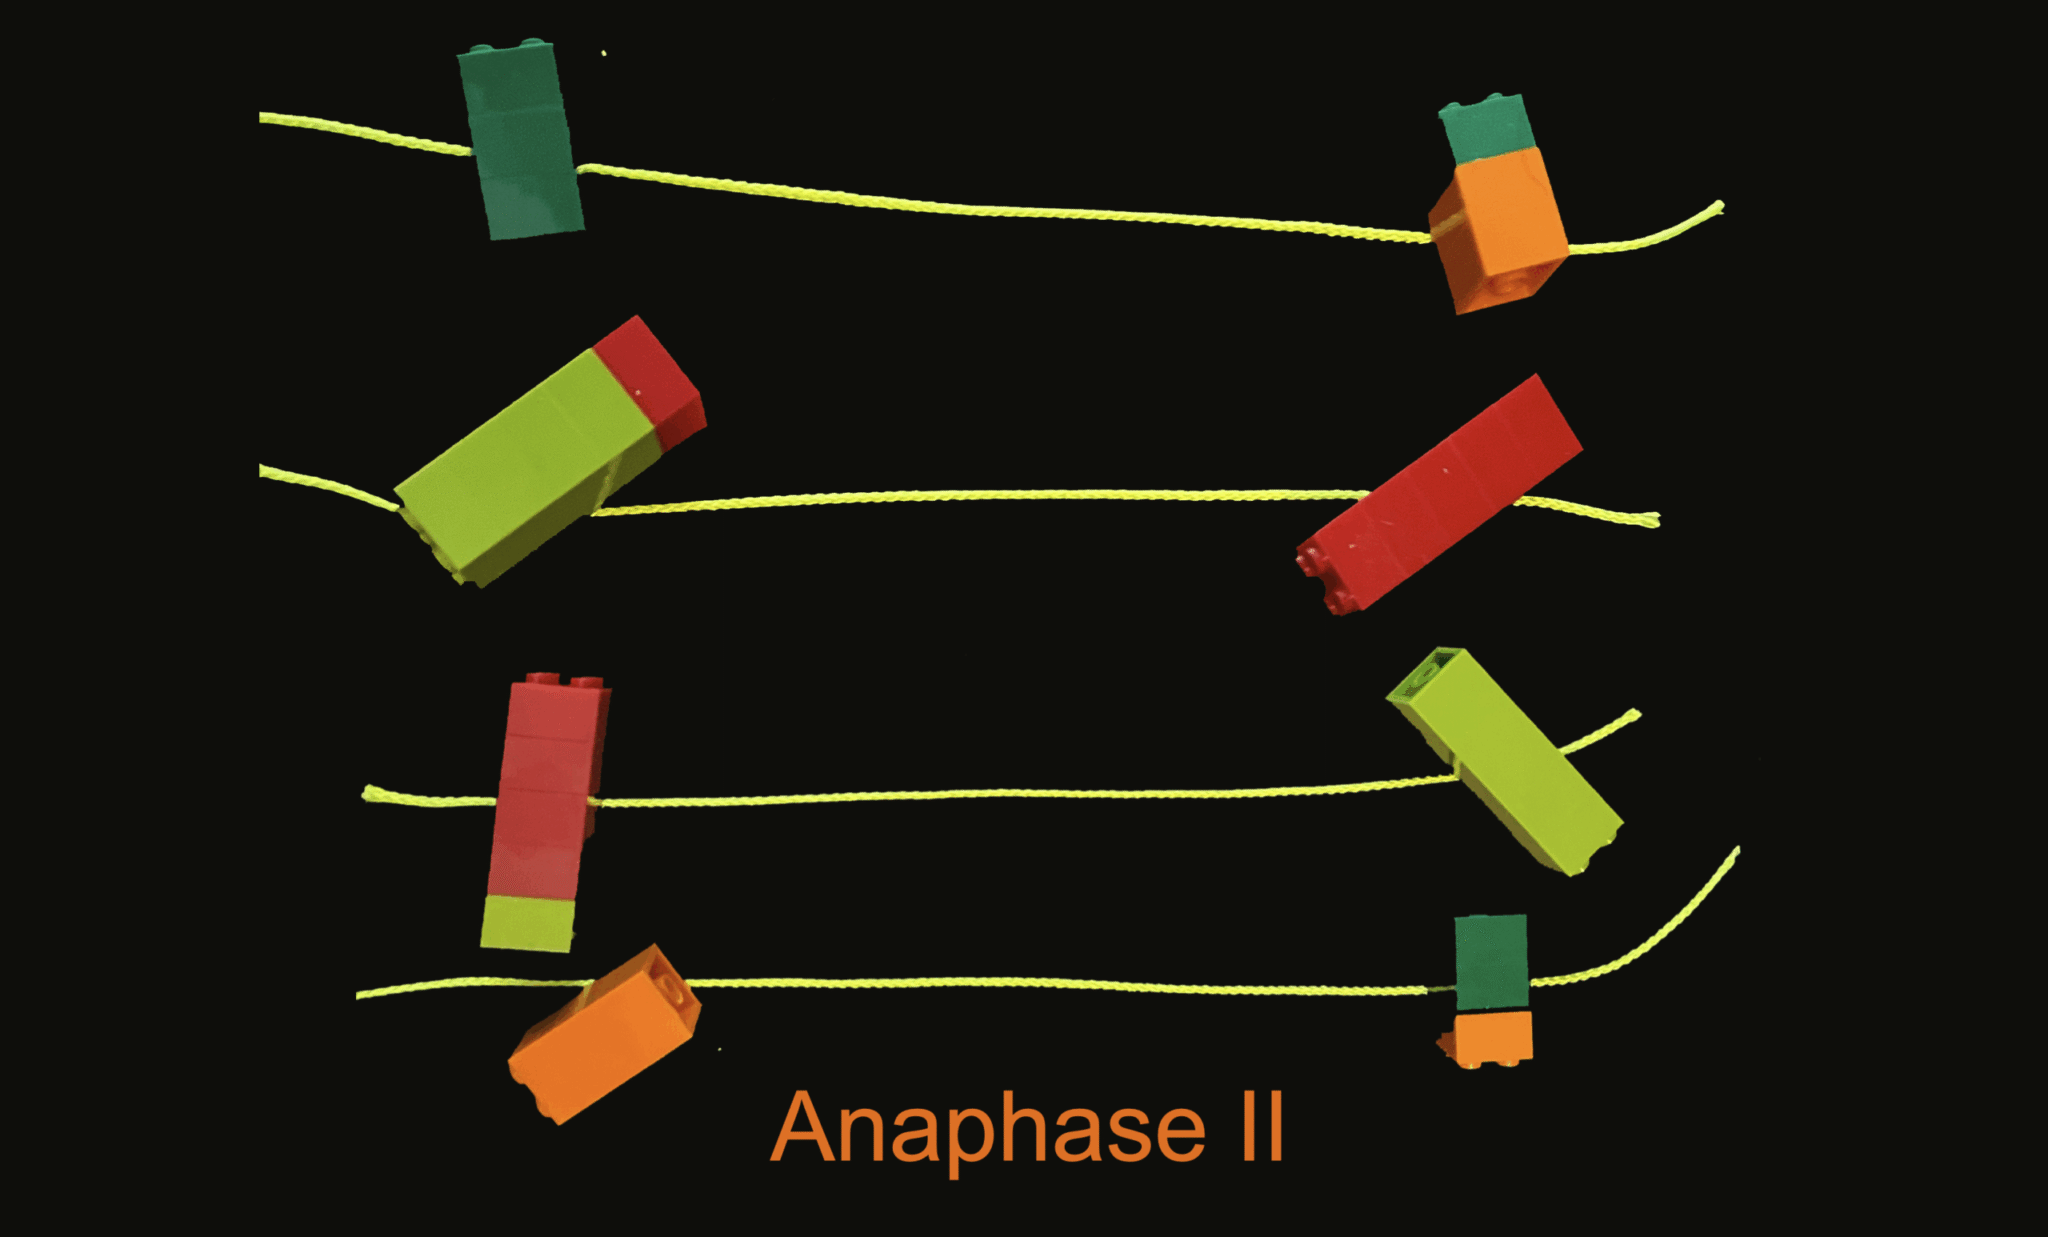
In this simulation, students will act as a cell undergoing meiosis, the process that creates gametes (egg and sperm cells). You’ll use colored LEGO bricks, string,and clay to represent chromosomesspindle fibers, and centromeres. You’ll trace every step from DNA replication to gamete formation. We will go through the process one step at a time. For simplicity, we will use only 4 chromosomes. So for this cell the diploid number (2n) is 4, and the haploid number (n) is 2.

Interphase I – Preparing for Division

1. Place 4 single chromosomes inside a string circle to represent the nucleus:

• 3 Dark Green bricks + 3 Orange bricks (1st homologous pair)

• 5 Dark Light bricks + 5 Red bricks (2nd homologous pair)

2. These chromosomes are unduplicated — DNA replication hasn’t happened yet.

Prophase I – Chromosomes Duplicate and Cross Over

3. Duplicate each chromosome using identical LEGO bricks and join sister chromatids with a clay centromere.

4. Pair homologous chromosomes side by side to form tetrads (groups of 4 chromatids).

5. Simulate crossing over:

  • Exchange 1 or 2 bricks from one chromatid in each homologous pair with its partner.

Metaphase I – Chromosome Pairs Line Up

6. Remove the string circle (nuclear membrane).

7. Lay out two spindle fibers (string) across your surface.

8. Align each tetrad in the center of the spindle — side by side.

Anaphase I – Homologous Chromosomes Separate

9. Use your hands to pull one duplicated chromosome from each pair to opposite sides. Do not separate the sister chromatids — centromeres stay intact.

Telophase I – First Division Complete

10. Remove the spindle fibers.

11. Use string to form two new nuclei, each with one duplicated chromosome from each original pair.

Interphase II (if it happens at all)

12. This phase may be skipped. If it happens, it’s brief and has no DNA replication.

Prophase II – Second Division Begins

13. Remove the nuclear membranes again.

14. You now have two cells, each with duplicated chromosomes

Metaphase II – Chromatids Line Up

15. Add new spindle fibers across each cell.

16. Line up each chromosome (still joined chromatids) in the center.

Anaphase II – Chromatids Finally Split

17. Remove the clay centromeres.

18. Pull the sister chromatids apart to opposite sides of each cell.

Telophase II – Meiosis Is Complete

19. Remove the spindle fibers.

20. Form a string nuclear membrane around each chromatid group.

21. You now have four haploid gametes, each with one chromatid from each pair.

Summary of Meiosis

Scroll to Top